Ansible. My own orchestra!
So, what’s Ansible all about? GitHub describes it as a radically simple IT automation platform that makes your applications and systems easier to deploy. Sounds great, right? But that’s just the surface. Let’s dig in and see what Ansible really does.
First, we need a test environment. I’m going to use Vagrant (and Virtualbox as a VM engine). We need a couple of hosts, so I just took a Vagrantfile from one of my previous posts:
Vagrant.configure("2") do |config|

  config.vm.define "host1" do |host1|
    host1.vm.box = "centos/7"
    host1.vm.network "private_network", ip: "192.168.33.10"
  end

  config.vm.define "host2" do |host2|
    host2.vm.box = "centos/7"
    host2.vm.network "private_network", ip: "192.168.33.20"
  end

end
Once Vagrant finishes setting up the VMs, verify that they are running and accessible:
$ ping -c 1 -w 1 192.168.33.10 1>/dev/null && echo "host1 up!" || echo "host1 not available"
$ ping -c 1 -w 1 192.168.33.20 1>/dev/null && echo "host2 up!" || echo "host2 not available"
You should see output similar to:
host1 up! host2 up!
One of Ansible’s key advantages is that it works without requiring an agent on the client machines. This means you only need to install Ansible on the master host. On my Fedora system, I can install it using:
# dnf install ansible
# ansible --version
Now look at /etc/ansible directory on the master node:
$ ls /etc/ansible
ansible.cfg  hosts  roles
ansible.cfg is a main config file. Keep in mind, that ansible will look at config in the following order:
ANSIBLE_CONFIGenv variableansible.cfgin the current working directory,.ansible.cfgin the home directory or /etc/ansible/ansible.cfg, whichever it finds first.
Now we’re going to edit only one file - hosts. We need it to look like that:
$ cat /etc/ansible/hosts
<...default comments omitted...>
[easthosts]
192.168.33.10

[westhosts]
192.168.33.20

[easthosts:vars]
ansible_user=ansible

[westhosts:vars]
ansible_user=ansible
We’ve just added two host groups (yes, with one host in each).
After saving a file we need to make ssh-keygen and ssh-copy-id from master node to managed nodes. Yes, Ansible works via SSH. Ssh-keygen will ask you a couple of questions. But which user to use? I prefer to create new ones.
$ vagrant ssh host1
$ sudo -i
# useradd ansible
# passwd ansible
# exit
$ exit
$ vagrant ssh host2
$ sudo -i
# useradd ansible
# passwd ansible
And just in case: if you use centos (like I do in this example) you should edit /etc/ssh/sshd_config with adding “PasswordAuthentication yes”.
Ok, now we’re ready to copy our key
ssh-copy-id ansible@192.168.33.10
ssh-copy-id ansible@192.168.33.20
Ok, time to…
Run our first ad-hoc command
It’s very easy, just run
ansible all -a "cat /etc/redhat-release"
And you will see that:

Nice! And of course you may run it separately for each group:
$ ansible westhosts -a "ls /etc/ssh"
Ok, pretty easy. Now let’s try to play with…
Modules
$ ansible all -m ping
Just a ping.

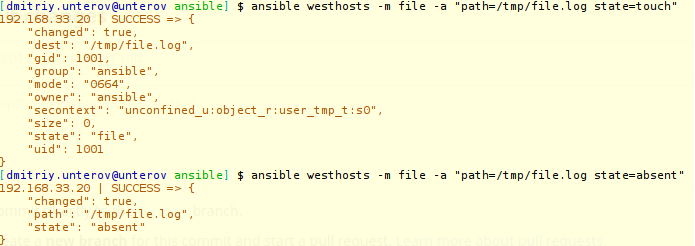
Let’s try to create file only on westhosts servers:

On the picture we see, that ‘state=’ parameter is response for file state (touch or absent).
Ansible has huge numbers of modules. All list HERE
Install package
Let’s pick some of them, yum for example. Assume, that we need some package to be installed on our servers. We know which package manager is used by our distributives, so we pick module and run it with correct parameter
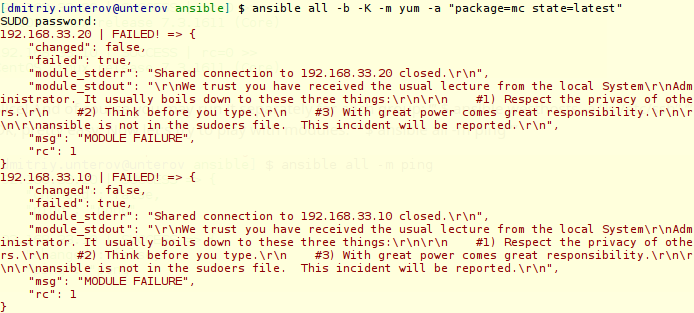
ansible all -b -K -m yum -a "name=mc state=latest"

And… Doesn’t work. Why? Because we (I mean user “ansible”) are not in managed node’s sudoers list. Fix it like this (works in CentOS):
$ vagrant ssh host1
$ sudo -i
# usermod -aG wheel ansible
# exit
$ exit
Repeat these steps for host2
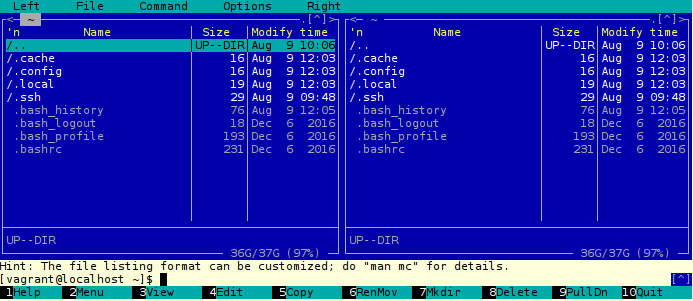
Try to run ansible again, and all should work as expected. Now login on host1 and check it:

And one last thing - delete package. It’s very easy. Just change “state=” to “absent”.
ansible all -b -K -m yum -a "name=mc state=absent"
Well, I think that’s enough for today. Next time I’ll write about playbooks. Stay tuned.